How to create an event

It is easy and user-friendly to create an event with EasySignup. You complete a simple 5-step wizard, where you enter information about your event. Then you are ready to receive registrations. You can change or add information to your event, when you created it.

See our how-to-video where we explain and show how you use this feature. 
Below the video you will find a step-by-step guide with text and pictures.


The 5-step wizard is explained below.

You create an event by clicking "Add Event" in the dashboard. You can also click "Add New Event" under "Events" in the top menu.

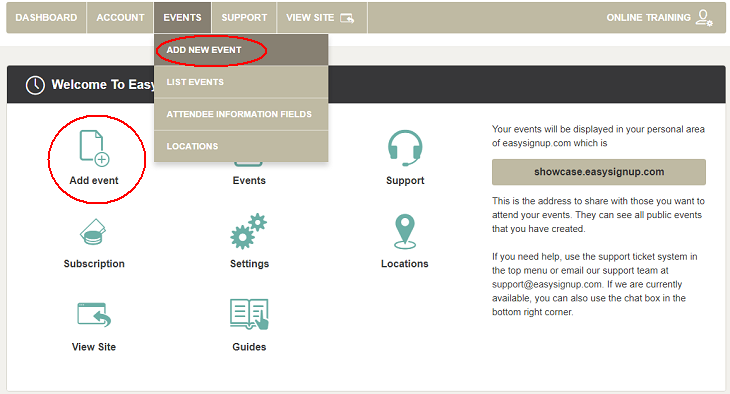
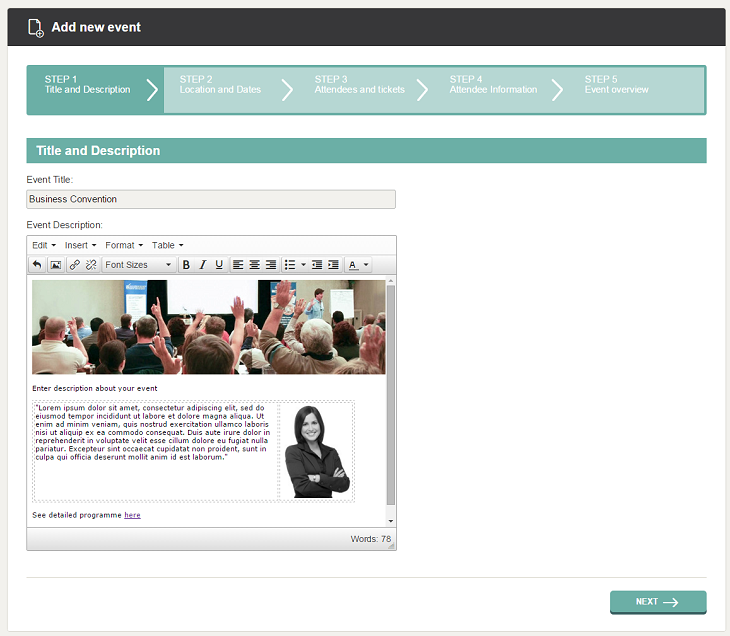
Step 1 - Title and Description

  • Here you describe the event. Give it a title and write a description about the event. You can format the text like when using Miscrosoft Word. If you do not have the description ready, you can write "Description coming soon". You can always change the description when you have the text ready.

    You can also insert images or links to websites or files using the features in the text editor. Find a guide to insert images here.
  • Click ”Next” to continue the wizard.

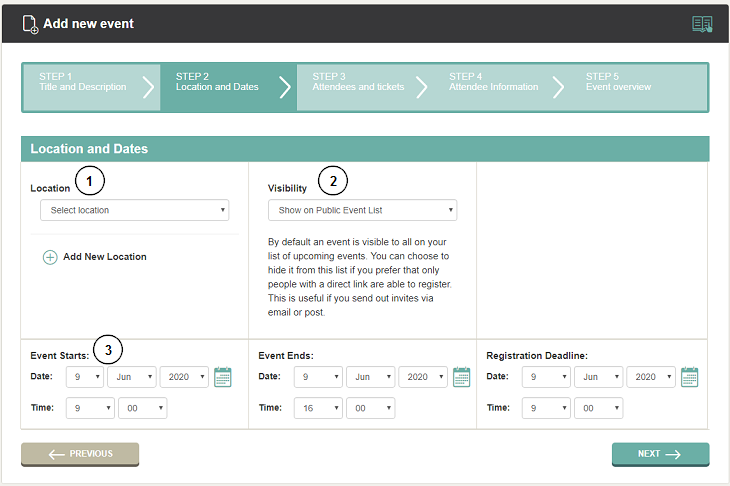
Step 2 - Location and Dates

  • Specify time and location for the event and registration deadline. You can also choose whether or not to include the event on the public list of events.
  1. Location: Select where the event takes place. You can choose between locations you have previously created in the drop-down menu. If you have not created any locations, click "Add new location". Enter the information and click "Add". The location is saved and you can select if from the drop-down list for future events.
  2. Visibility: Select whether to show or hide your event. Select "Show" if the event is open for everyone to register. You can also choose "Hide", i.e. the event is not visible on the front page so people must have the unique event URL to register.
  3. Select when the event starts and ends as well as an registration deadline.
  • Click ”Next” to continue the wizard.

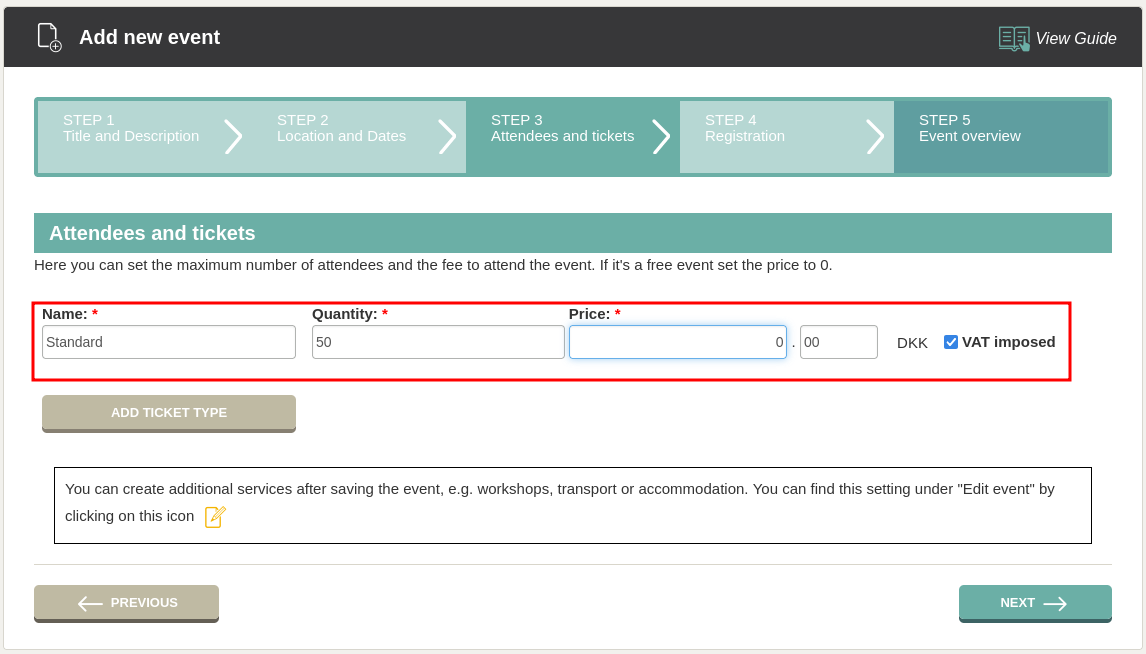
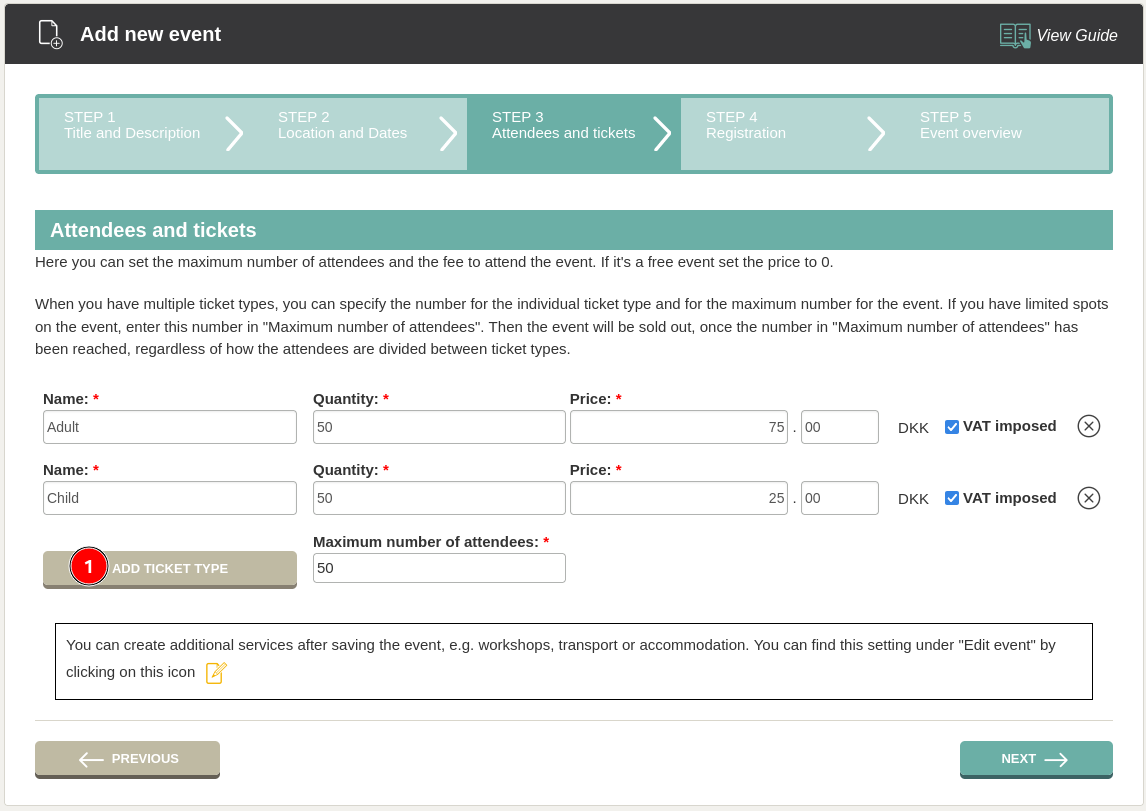
Step 3 - Attendees and tickets

  • Specify how many participants you have room for and the ticket fee if any. If it is free to participate type '0' in price.
  • You can create different ticket types, e.g."Adult" or "Child" by clicking "Enter multiple ticket types" and filling out the details. If you have room for a limited number of participants, please specify this. The system will display "Sold out", when this number is reached, no matter how the participants are divided.
  • Click ”Next” to continue the wizard.

Step 4 – Attedee information

  • Select the information you need about the participants. Name and e-mail are mandatory as we need this information to send a registration confirmation.

NOTE: If there is a ticket fee, participants must also enter their address so we can generate a correct invoice.

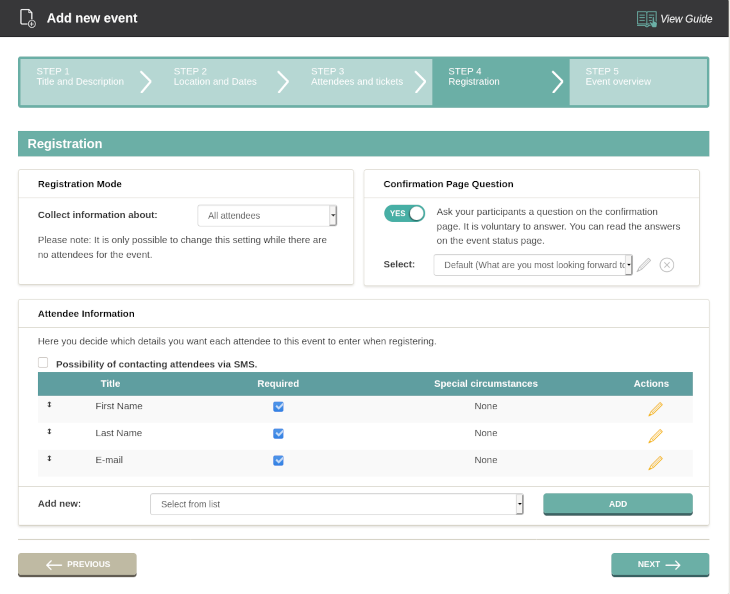
  1. Registration mode: Select whether you need information about each participant (conventions or conferences) or only the orderer (concerts etc.)

    Note: You can't change this, once people start to register for the event. 

    "All attendees" is used when you need information about all participants as well as their individual choice of additional services. 

    "Only orderer" is used when you want to sell tickets to a concert or movie and only need information about the orderer. Please note that the system can't generate nametags in this mode.

  2. Confirmation page question: Choose if you want to ask a question on the confirmation page. You can choose from various predefined questions as well as create your own.
  3. Attendee information: You can add additional information besides name and e-mail. Select from the drop-down list and click "Add".If you need custom information select "Add new".

    Check if you wish to have the possiblility to contact participants by text message. Cellphone number is then added. NOTE: Requires SMS-credits.
  • Click ”Next” to continue the wizard.

    NOTE: You can always add information after the event is created. You do this on the page, where you edit the event. However, the new information is not collected retroactively for participants, who registered before the new information was created.

Step 5 - Event overview

You are presented with a summary of your event. You and can edit it by clicking on the information that you want to edit.

If you have chosen that notes about the event should be part of the wizard, you can write the note at the bottom of the page.

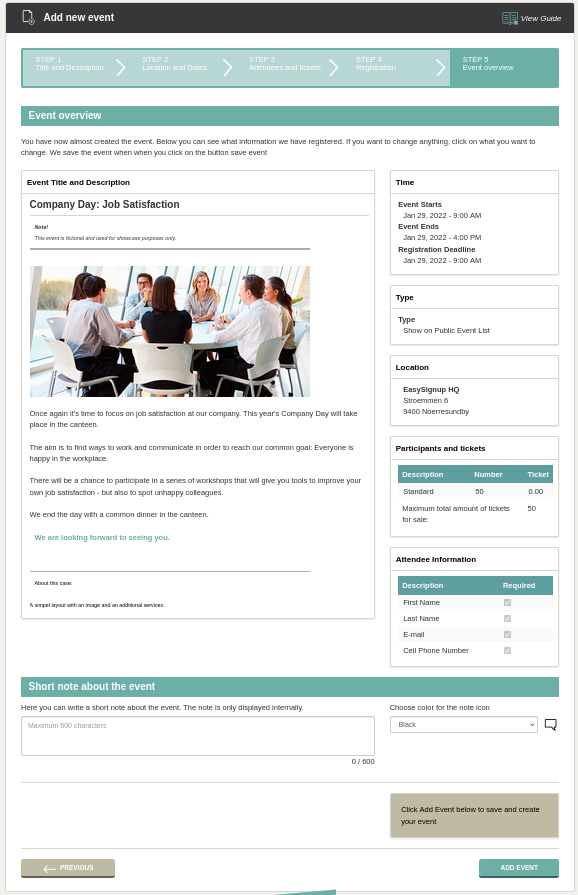
Always remember to click "Add event" at the bottom right-hand side of the page, where you are done.

Your event is now created. If you are ready to receive registrations, you can accept the terms of registration and publish the event.

If you are not ready yet, you can simply click away from the page and publish the event later. You do this from the page where you edit the event.

Introductory Videos

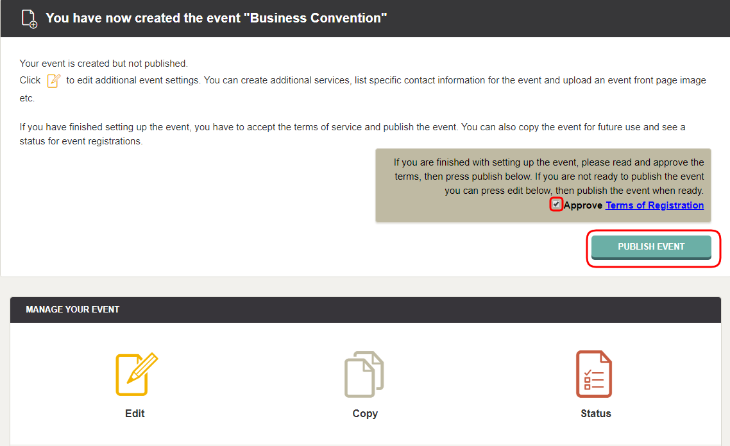
We've made a series of videos showing you how to use EasySignup.

Watch introductory videos

Frequently Asked Questions

Whether you are a participant or an organizer, some of the questions you might have about the IT-system are answered here.

Read the answers

Support - weekdays
9:00 AM - 4:00 PM CET

Mette Jellesen and Jacob Thomsen
Support and Communication

support@easysignup.com

Get in touch

You must fill a name.
You entered an incomplete or invalid email.
You must fill a subject for the message.
You must fill out a message.

Event registration? Easy peasy if you ask