Registering attendees with EasySignup gives you the opportunity to use online check-in to register attendees on the day of your event.
Afterwards you can see an attendance overview and contact both "no-shows" and persons that attended the event.
See our how-to-video where we explain and show how you use this feature.
Below the video you will find a step-by-step guide with text and pictures.
Step-by-step guide
All from your EasySignup dashboard.
Find the check-in feature on the event report page. Click on the event title or the report icon in the list of events to see the event report page.![]()
Find the section "Check-in status" - right above the attendee list.
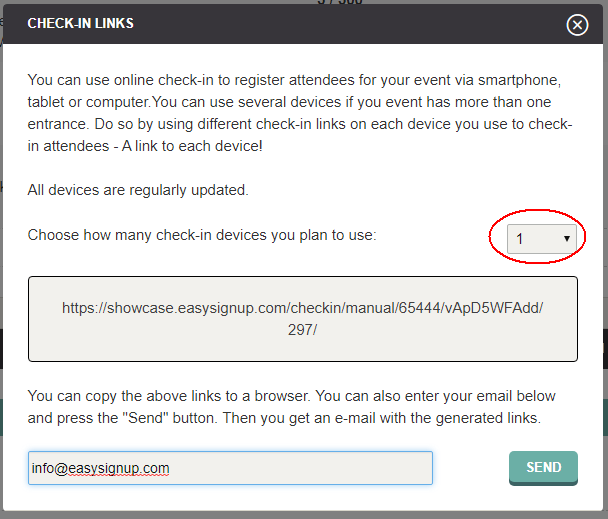
Click on "Check-in links" in the black header to generate your check-in link(s).
You can generate a link to each device (tablet, smartphone or computer). You must select "1" as a minimum. There's no problem in using the same link on several devices.
All devices are regularly updated.
You can either copy the link or sent it to an e-mail address. The links will be active until 14 days after the event has ended.
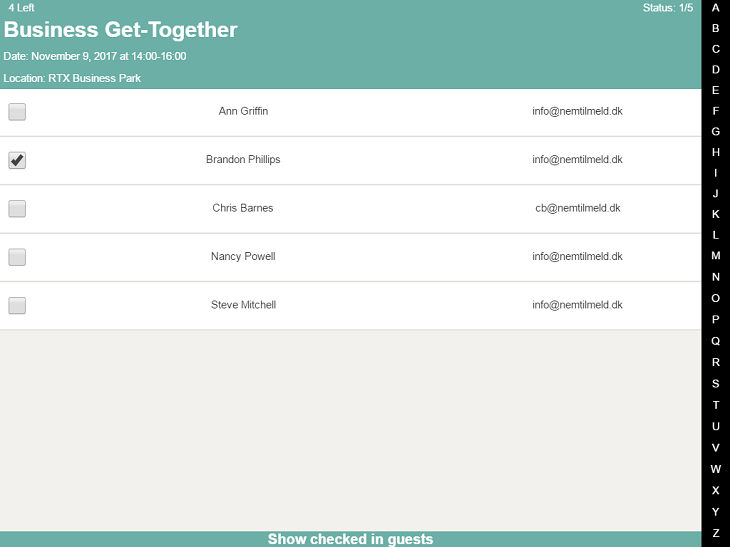
Open the link(s) on the day of your event and ticked off arriving attendees. A person is not removed until you've ticked off another person. So you have a chance to undo a mistake.
Click "Show checked in guests" to see a full list of attendees.
Once the event is over you can see an attendance overview on the event report page (same section where you generated the check-in link).
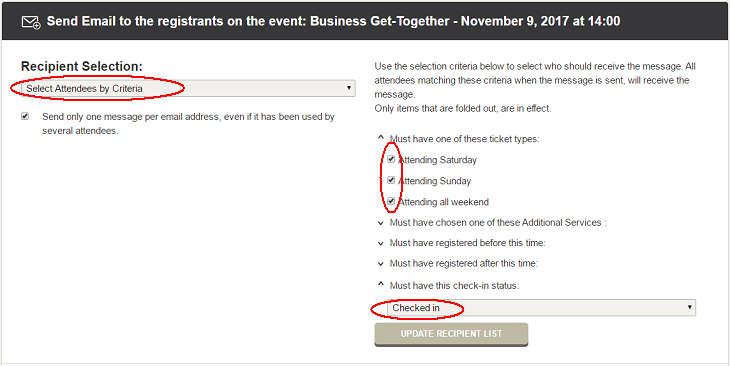
You can contact both the "Attending" and "Not attending" group after the event is over. This is done on the page where you contact attendees.

Find a guide to contact attendees here
We've made a series of videos showing you how to use EasySignup.
Watch introductory videosWhether you are a participant or an organizer, some of the questions you might have about the IT-system are answered here.
Read the answers
Mette Jellesen and Jacob Thomsen
Support and Communication


