 Loading
Loading
Loading
You need to communicate last minute updates or other important information about your event? No worries. You can send messages to attendees before, under and after your event using EasySignup.
See our how-to-video where we explain and show how you use this feature.
Below the video you will find a step-by-step guide with text and pictures.
Step-by-step guide
Messages are sent via the event status page.

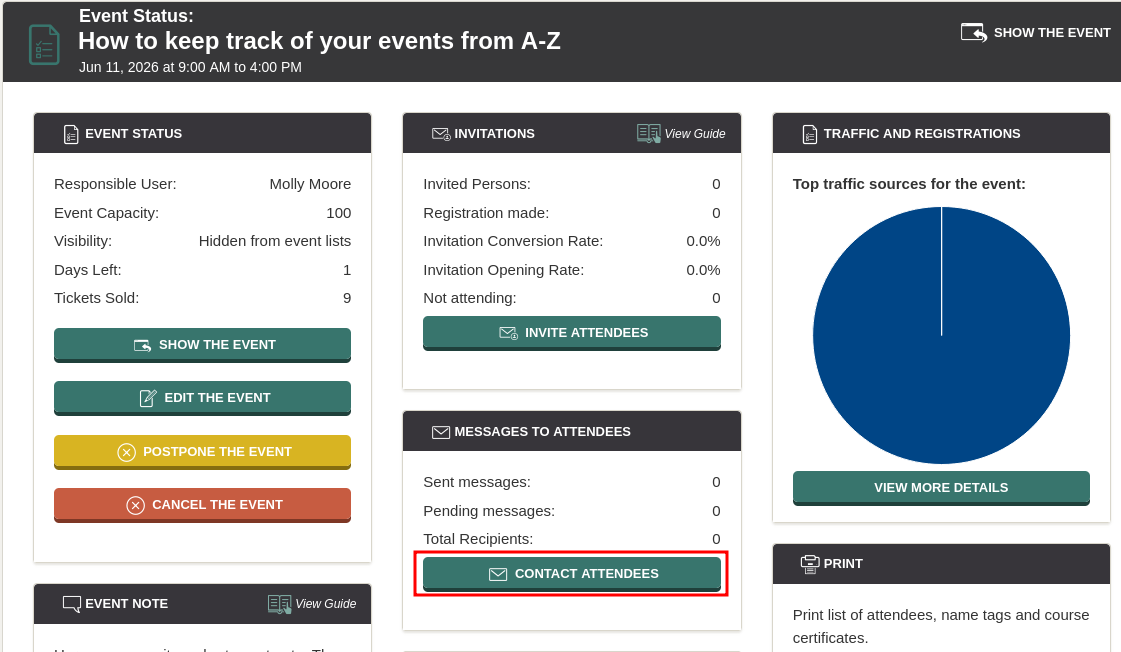
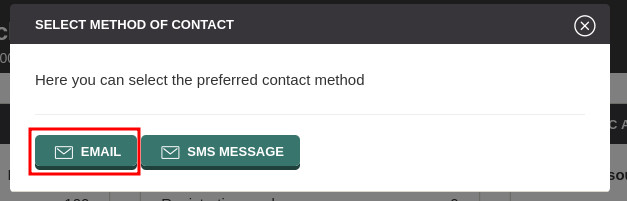
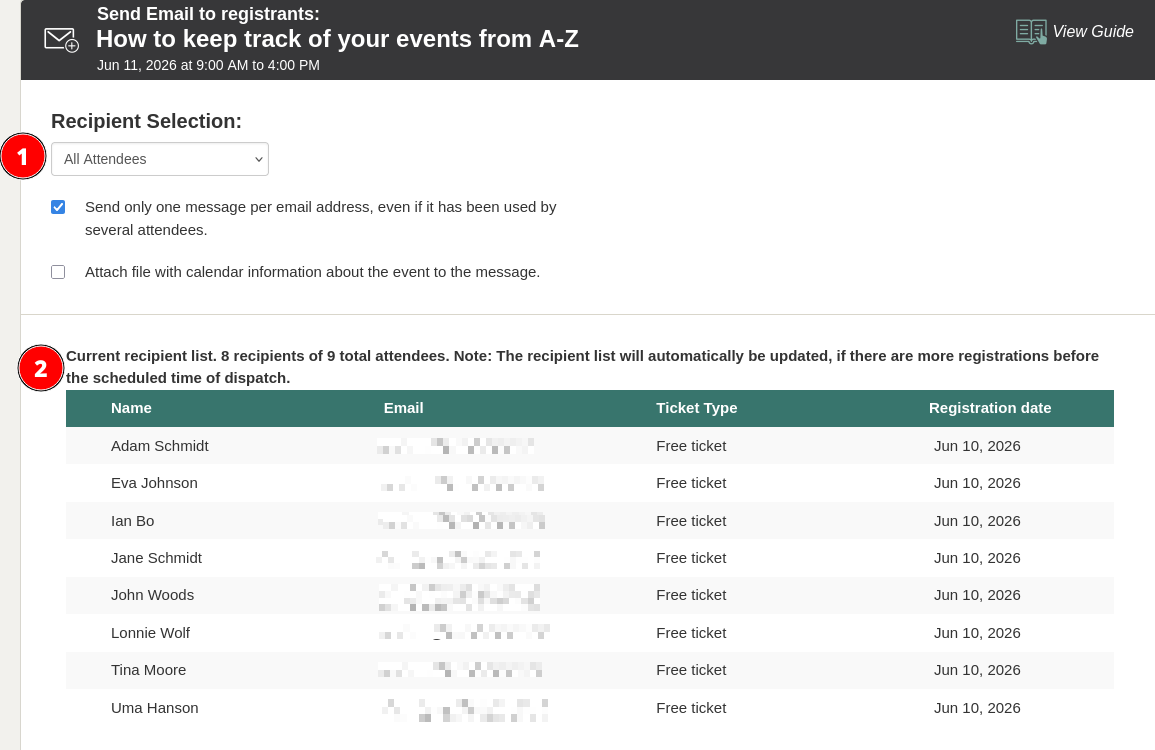
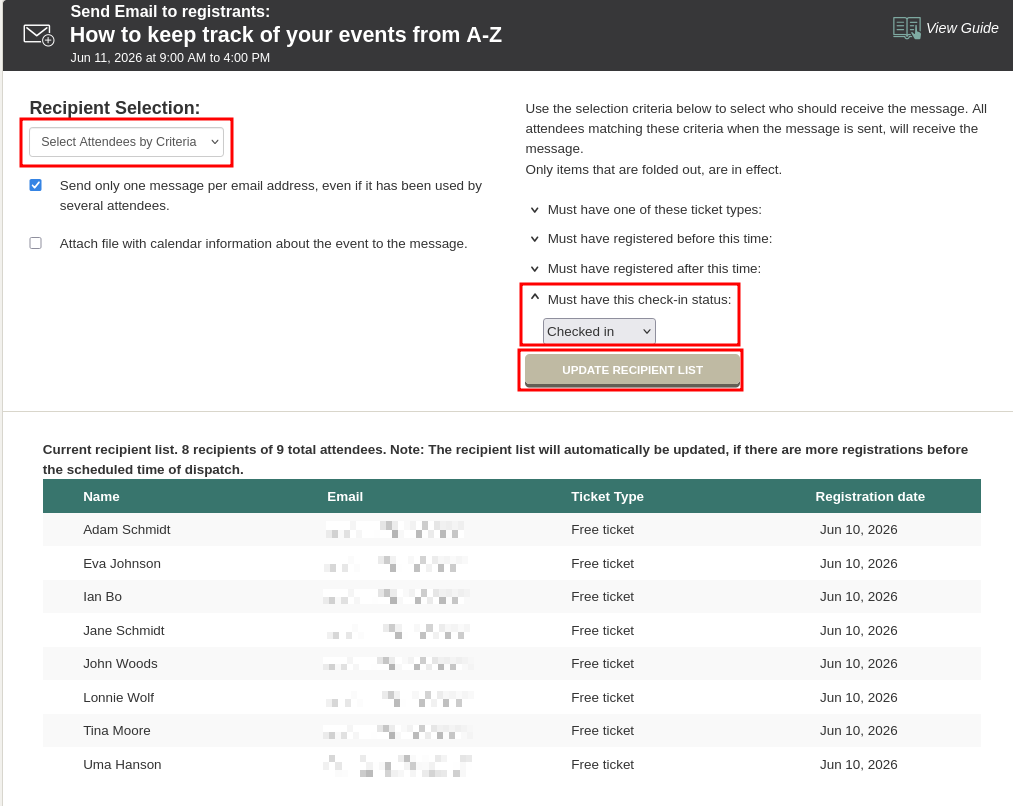
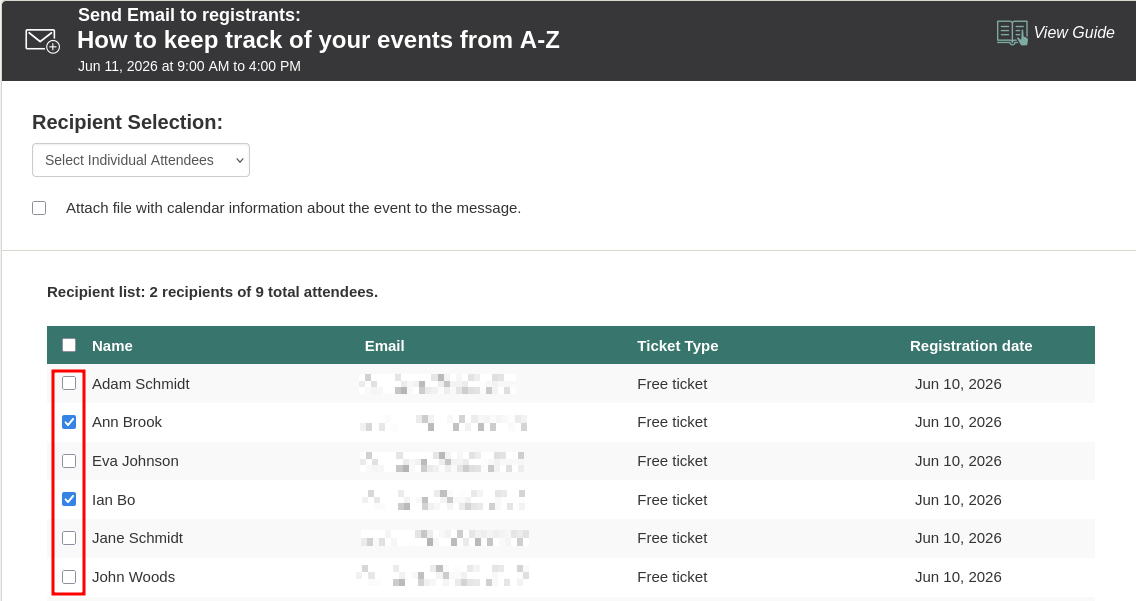
Create and send the email
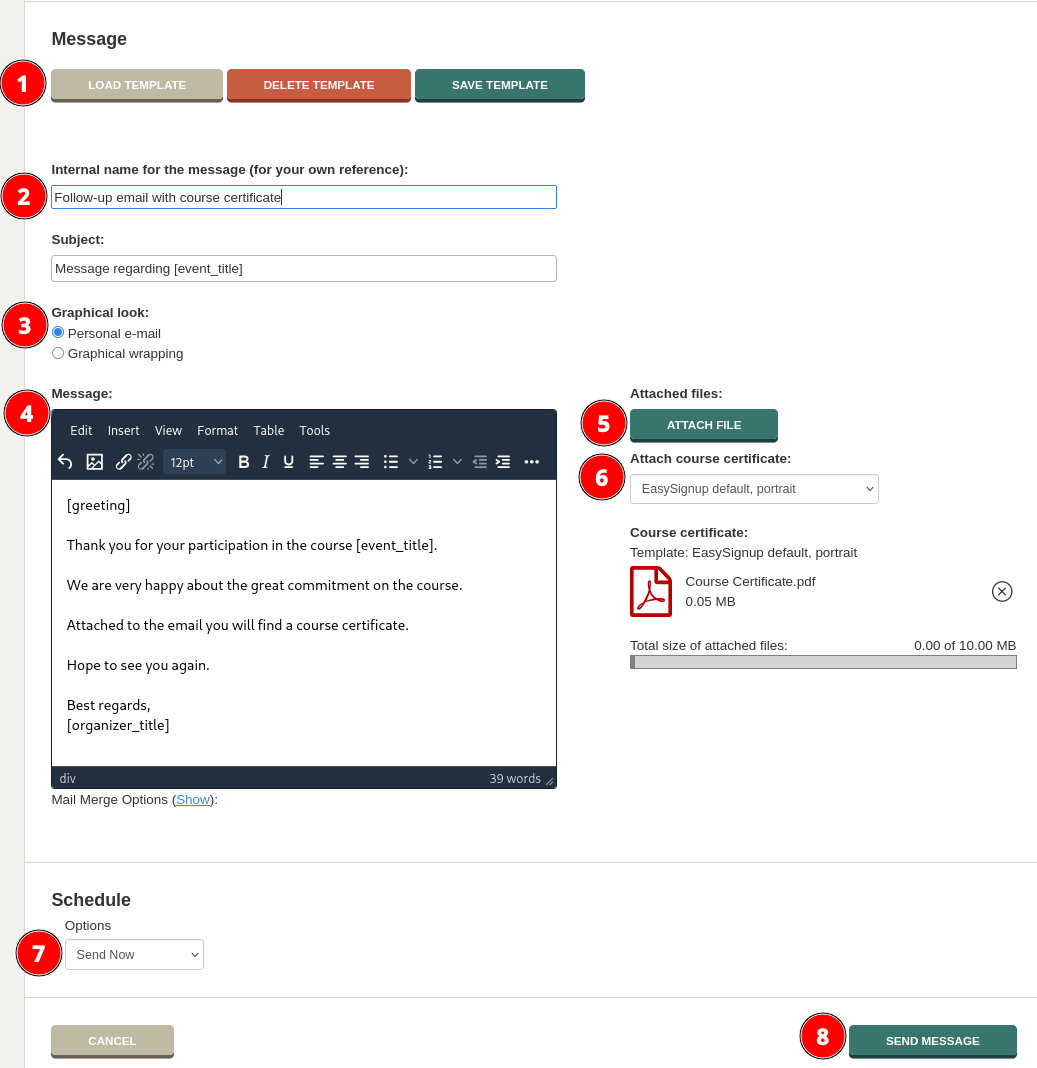
Further down the page you can write the email and choose when to send the it:
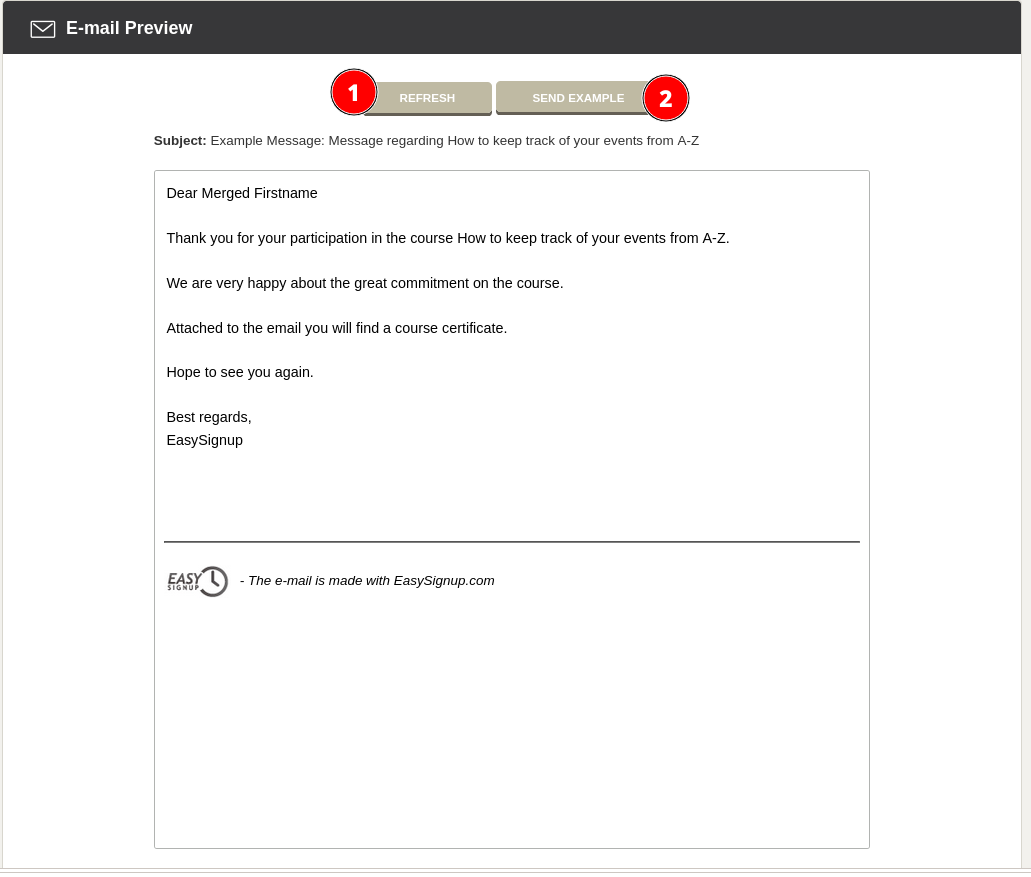
Preview
You can see a preview of the email at the bottom of the page.
See list of sent and scheduled messages
You can see a list of all event messages via the event status page. Once you've sent or scheduled messages the button is named "View and Send Messages".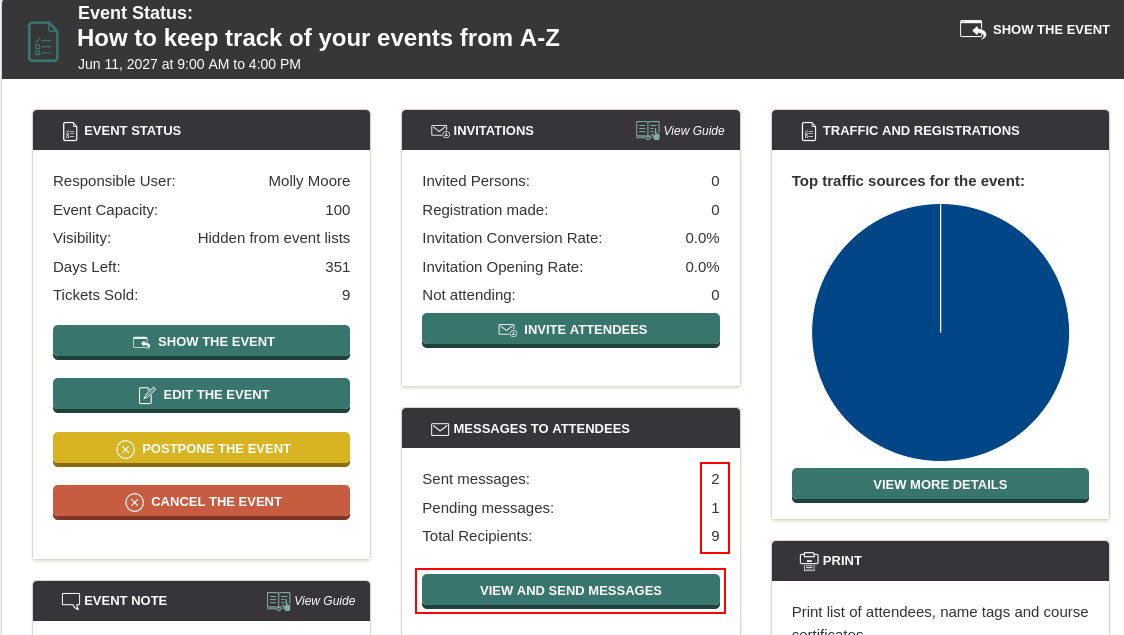
You can now see a list of sent and scheduled messages for the event.
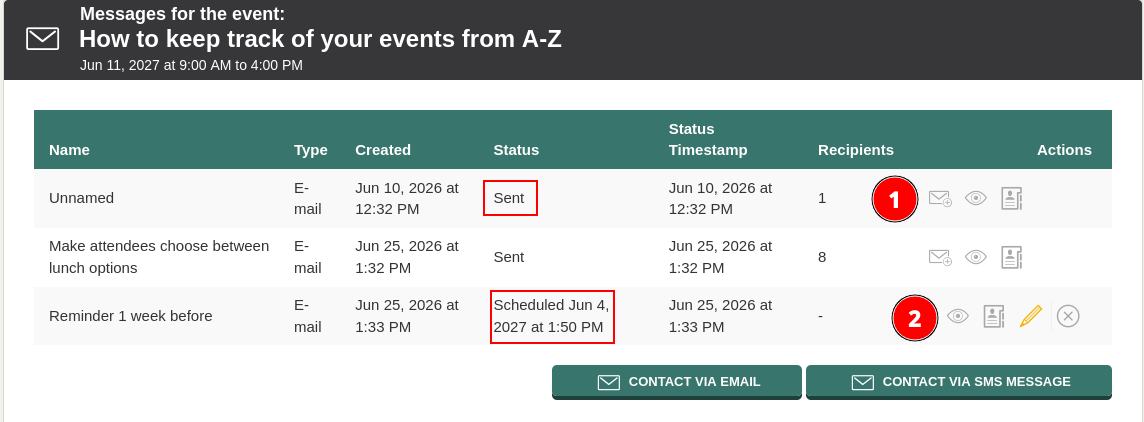
You can also create and send new messages from this page.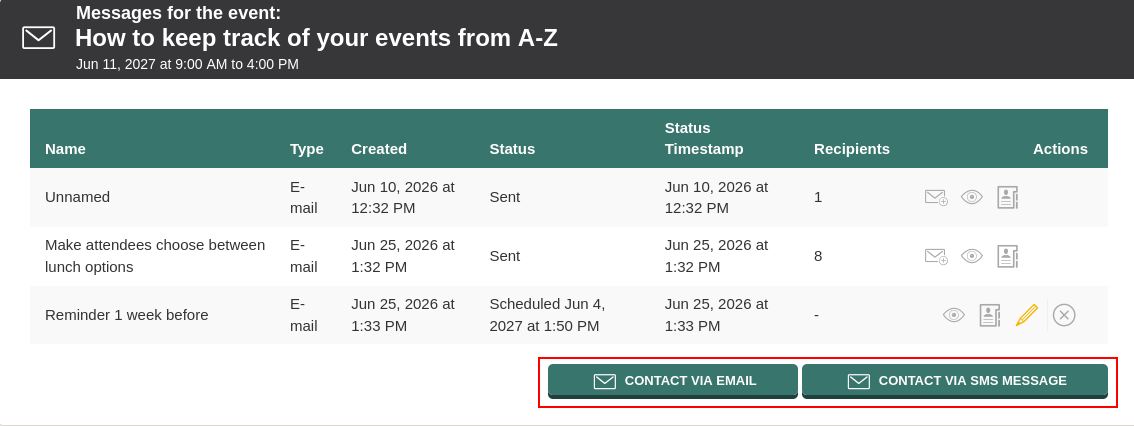
You can also send text messages to the attendees. See how here
We've made a series of videos showing you how to use EasySignup.
Watch introductory videosWhether you are a participant or an organizer, some of the questions you might have about the IT-system are answered here.
Read the answers
Mette Jellesen and Jacob Thomsen
Support and Communication