Display/hide event time and date on registration page (for a single event)

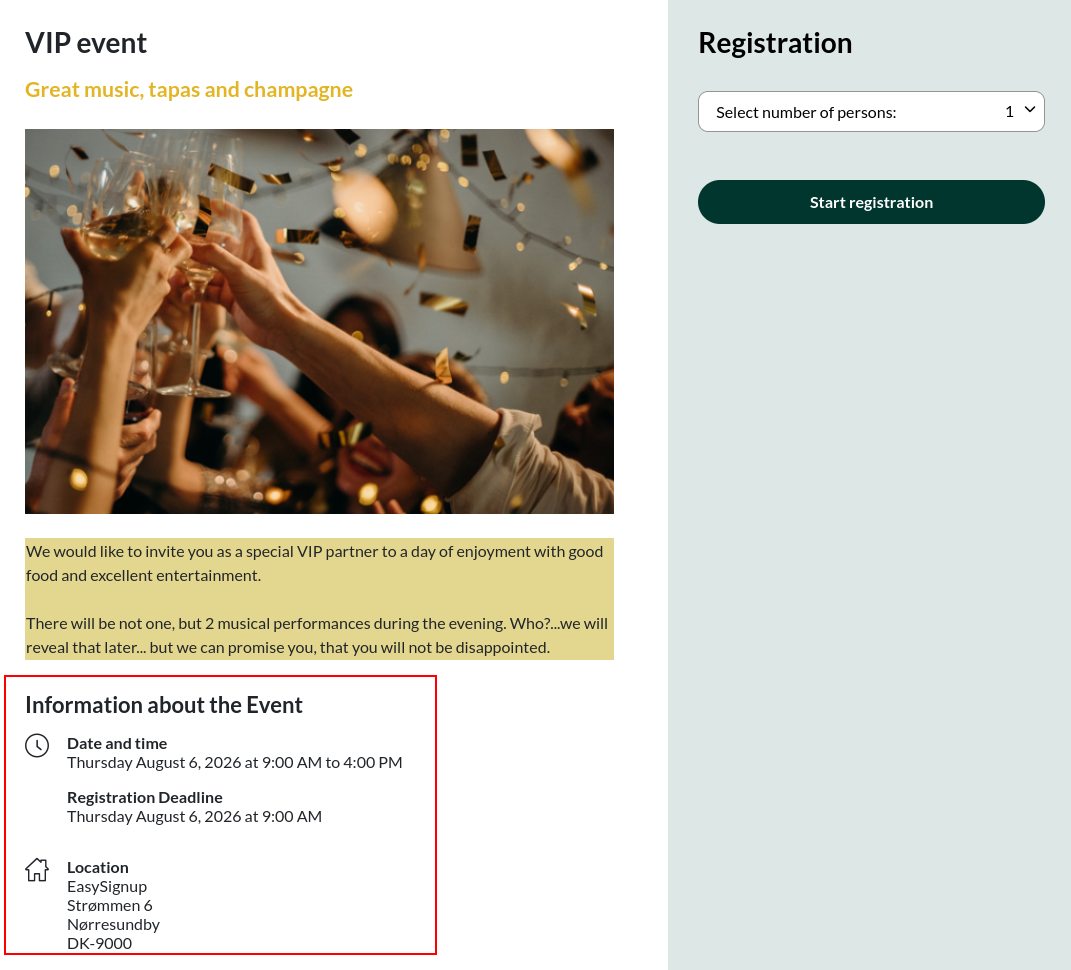
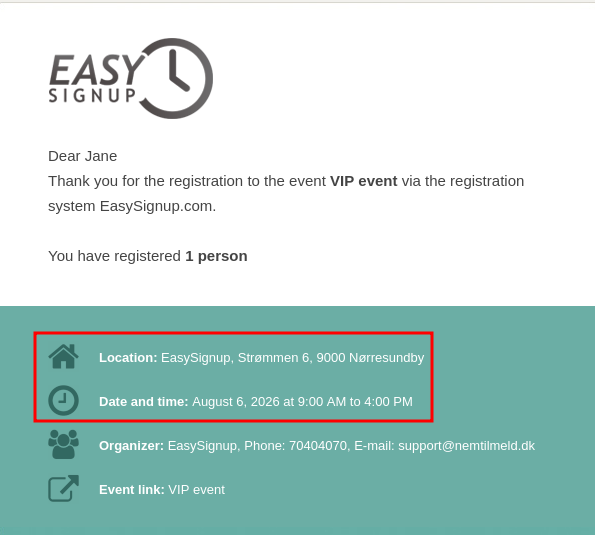
You can choose whether start date, end date, registration deadline and location are displayed on the registration page and in confirmation e-mails.

It can be useful on webinars without a physical location. It can also be used on events that are held over several days. Here you will then write the different start and end times in the event description.

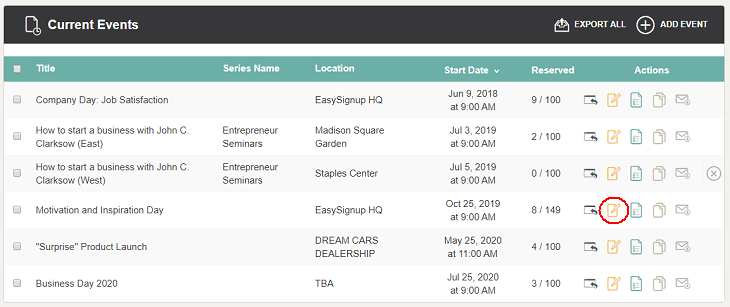
This guide shows you how to change this setting for a single event if it has to differ from the default applying to all events. See how to set the default here.

  • Find the event and click on the edit button.
  • Find the section "Presentation of Event" under the tab "Presentation".

    You can select "Yes" or "No" to displaying the various times and the location.
  • Click "Save and stay on the page" to save and continue editing or "Save changes" to save and return to the list of events. Both buttons are located at the bottom right hand side.
  • Here are examples of where event times and location are displayed on registration pages and in confirmation e-mails.


Introductory Videos

We've made a series of videos showing you how to use EasySignup.

Watch introductory videos

Frequently Asked Questions

Whether you are a participant or an organizer, some of the questions you might have about the IT-system are answered here.

Read the answers

Support - weekdays
9:00 AM - 4:00 PM CET

Mette Jellesen and Jacob Thomsen
Support and Communication

support@easysignup.com

Get in touch

You must fill a name.
You entered an incomplete or invalid email.
You must fill a subject for the message.
You must fill out a message.

Event registration? Easy peasy if you ask