How to cancel or postpone an event

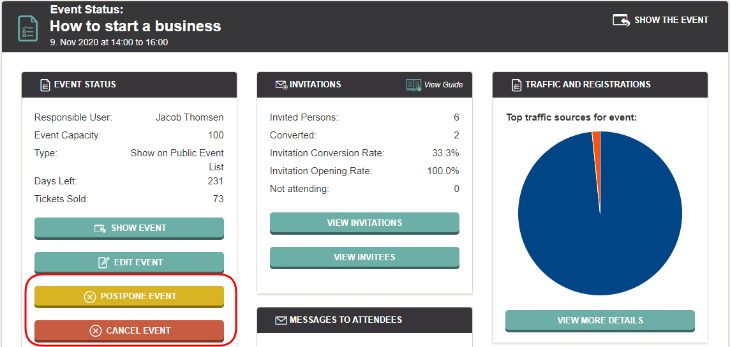
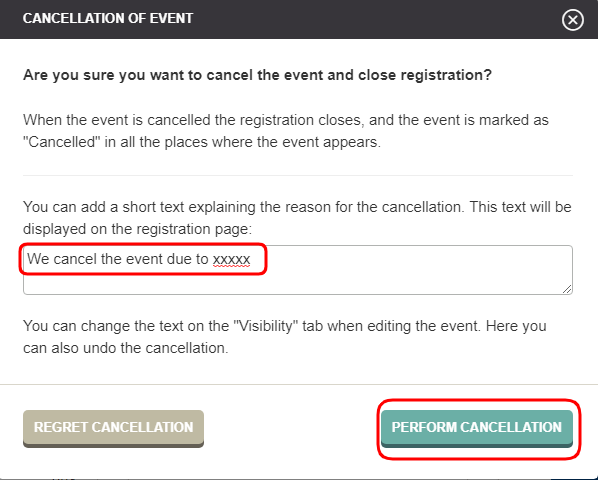
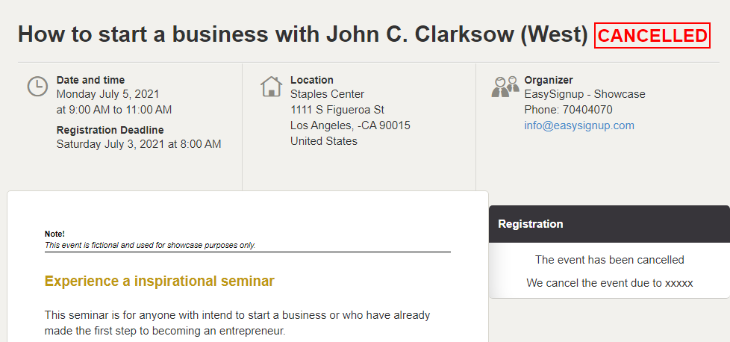
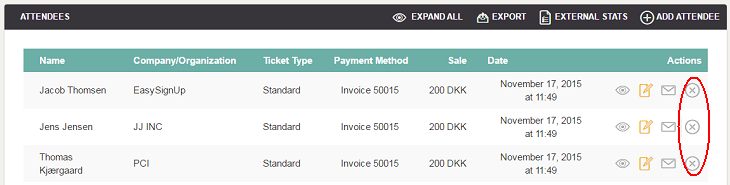
If you have to cancel or postpone an event, it is important to prevent further registration, communicate with your attendees and cancel/refund their orders.

  • Start by closing for new registrations by canceling or postponing the event. You do so on the event report page. Click "Cancel Event" or "Postpone Event".
  • You can choose to write the reason for the cancellation or postponement. Note: This text is displayed on the registration page. Then click "Perform postponing" or "Perform cancellation".
  • The event is now canceled or postponed and registration is closed.
  • Now let the attendees know about the cancellation or postponement. Go to the event report page and click "Contact attendees". Let them know about the expectations for refunds, who they can contact with further questions, or if you plan on re-scheduling the event.

    You can find further explanation on how to contact attendees in this guide.
  • If you cancel your event and people paid to attend, you can start refunding the registrations.

    If attendees have paid by credit card/MobilePay (only in Denmark), transaction fees may block you from refunding one or more attendees as transaction fees will be deducted from the event's revenue and forwarded to NETS and other acquirers.

    Therefore, you might need to start by making a bank transfer with the text and the account number you are given when you press “Perform Payin of Transaction Fees” from the event status page. Over the course of a few banking days, the money will be available on the event. Then the transaction fees no longer block refunding.

  • When you want to start refunding attendees, click on "Refund all participants".
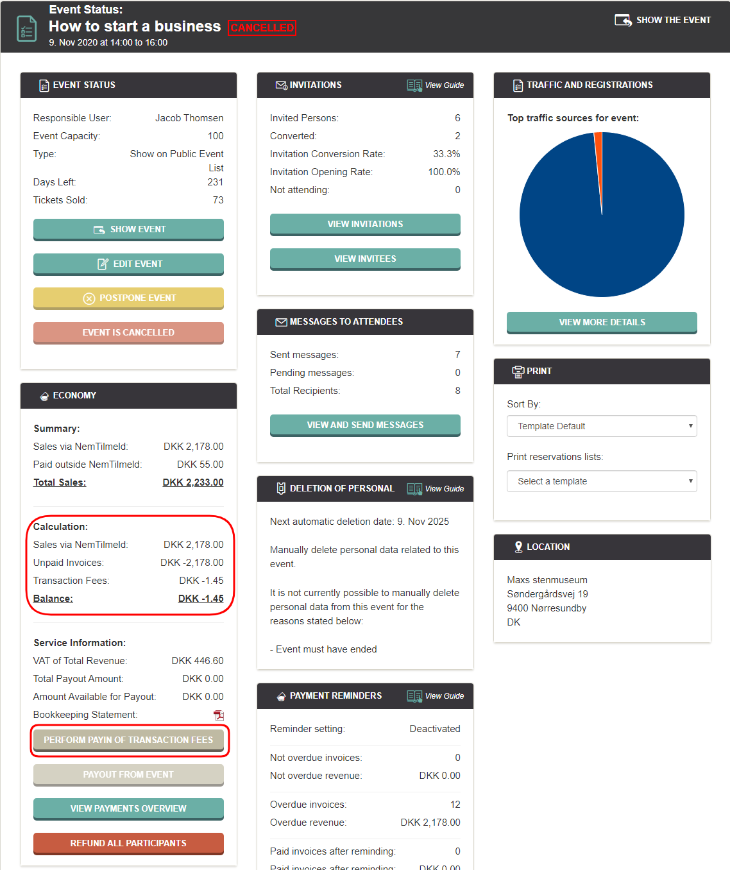
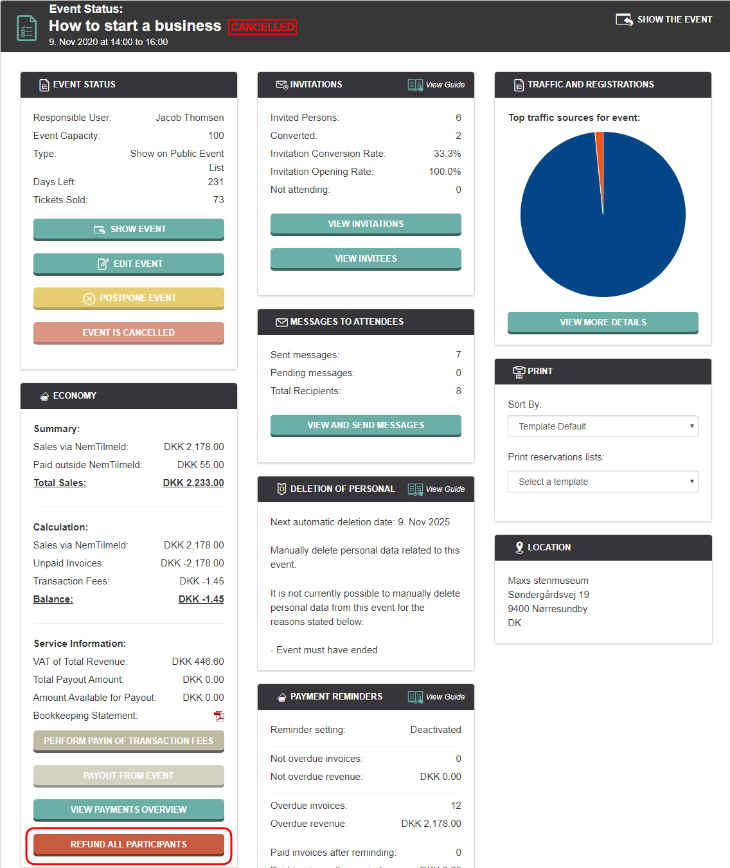
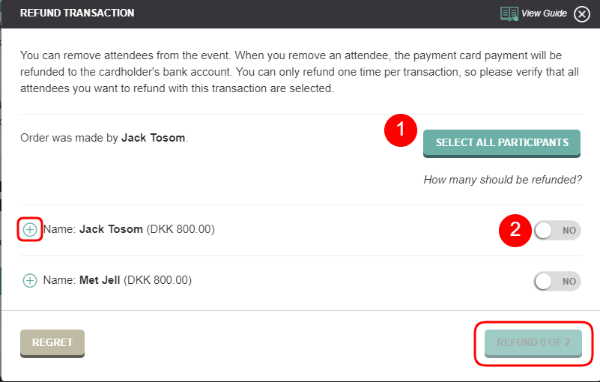
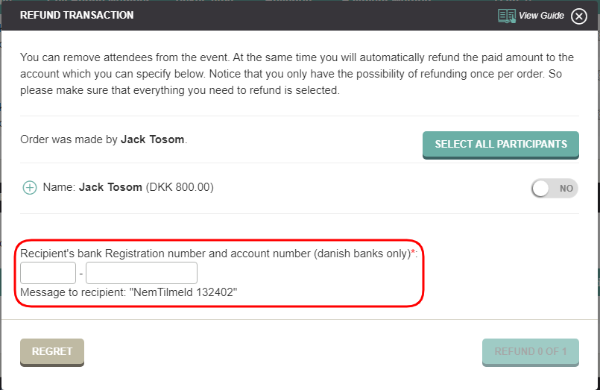
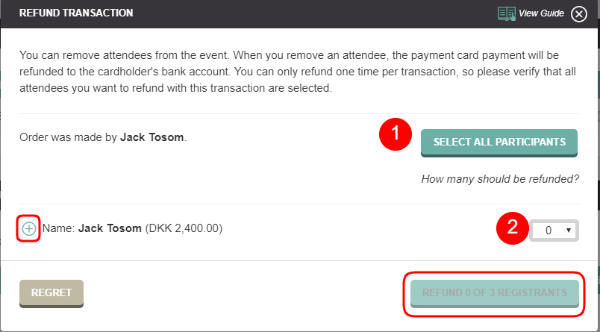
  • When you click "Refund all participants" you will get a popup window (see below). Please note that you can only refund registrations paid by credit card or MobilePay (only in Denmark) as well as cancel pending invoices. You can read more about this in the popup window.

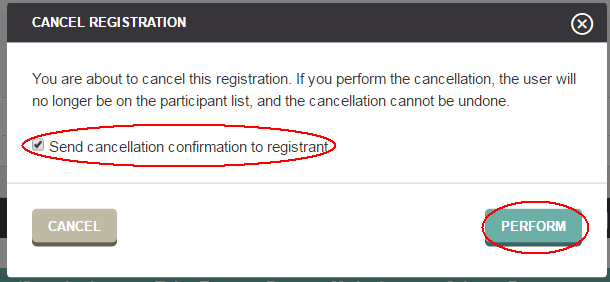
    In the drop-down menu in the popup window select whether you have contacted the participants (1). Please note that participants will be moved to the list of cancelled registrations when the refund is complete. Therefore, you cannot contact them via EasySignup once you have refunded them.

    For security reasons, you will be asked to enter your password (2).

    You can then click "Perfom refund":

  • The process of refunding will now start. You can follow the process in a new window. Do not close the window during this process. Once the refund is complete, you can close the window. Please not the the registrations that couldn't be refunded.
  • If you have refunds that couldn't be completed automatically, it may be because you have paid invoices where you need an account number in order to refund the money. It may also be because there is no cover on the account to complete all refunds.
  • In order to refund registrations that couldn't be refunded automatically, you need to refund them manually. You do so from the event report page. Go to the "Attendees" section. Next to each attendee, click on the red cross to unsubscribe.
    • Free registration: Choose whether to send an cancellation e-mail to the attendee and click "Perform" to cancel the registration.
    • Paid registration: You must actively choose what you want to refund. If you have to refund the entire order, you can click "Select all participants" (1).

      If you only have to refund individual persons, select "Yes" next to them (2). View order details by clicking "+" next to the name of the person.

      Click the green button and the attendee fee is transferred to the credit card used at registration.
       
    • You need to enter a bank account number if it is a refund of an invoice payment or EAN.
  • Have you only collected information about the orderer, you'll see a drop down menu if the orderer has registered more than more person. 

    If you have to refund the entire order, you can click "Select all participants" (1).

    If you only have to refund individual persons, choose the number you want to refund (2). View order details by clicking "+" next to the name of the person.

    Click the green button and the attendee fee is transferred to the credit card used at registration.
  • Finally, you can delete the event if you wish to. Click on the "X" next to the event. Please note that the "Delete" option won't appear until you've refunded/cancellted all registrations.
  • To remove the postponement or cancellation, edit the event and find the setting under the "Visibility" tab. Remember to save at the bottom right.

Introductory Videos

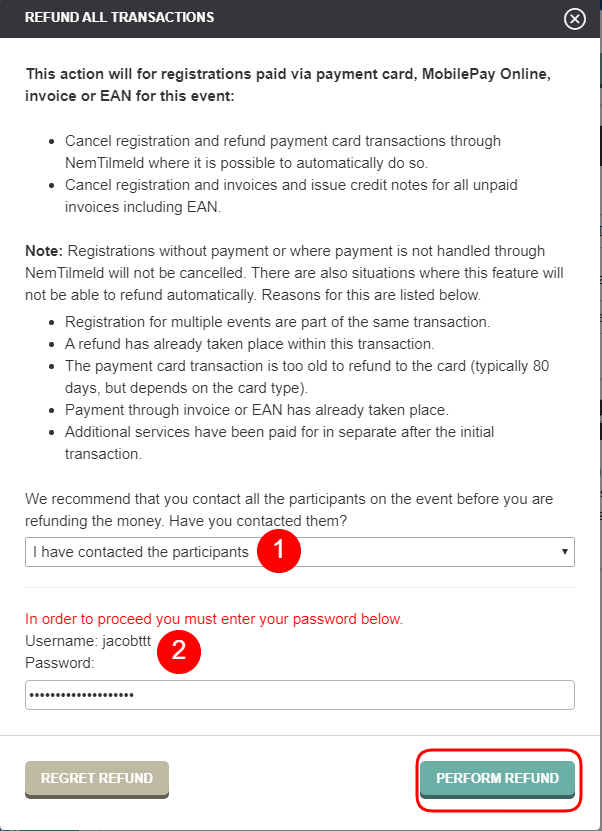
We've made a series of videos showing you how to use EasySignup.

Watch introductory videos

Frequently Asked Questions

Whether you are a participant or an organizer, some of the questions you might have about the IT-system are answered here.

Read the answers

Support - weekdays
9:00 AM - 4:00 PM CET

Mette Jellesen and Jacob Thomsen
Support and Communication

support@easysignup.com

Get in touch

You must fill a name.
You entered an incomplete or invalid email.
You must fill a subject for the message.
You must fill out a message.

Event registration? Easy peasy if you ask