 Loading
Loading
Loading
It is easy to create series in EasySignup.
Series make it easier for visitors to get an overview and navigate in events with the same content, but held at different places og times.
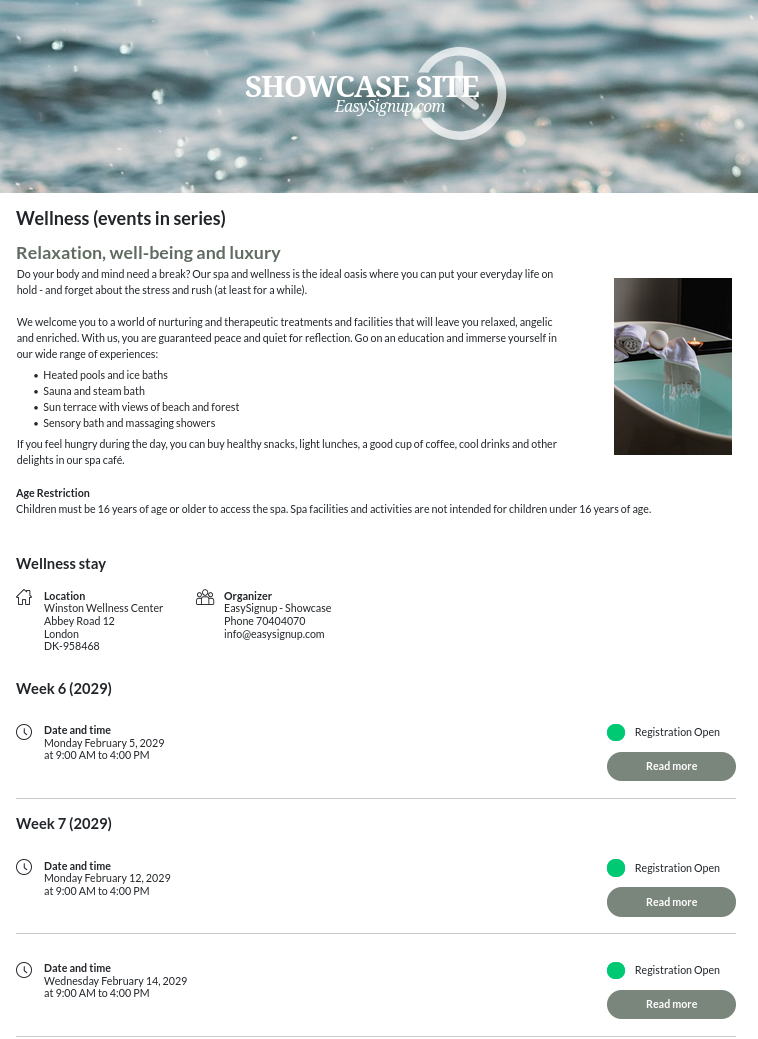
You can se an example of a series here.
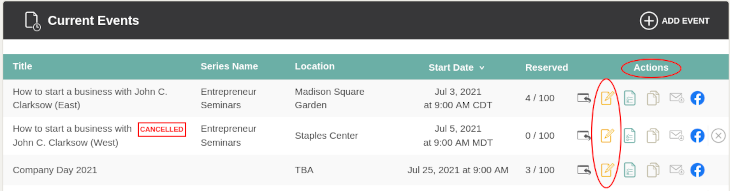
Start by creating the first event, which should be part of the series. Once it has been created or if you have already created it, click on the edit icon at the right of the event under "Actions":
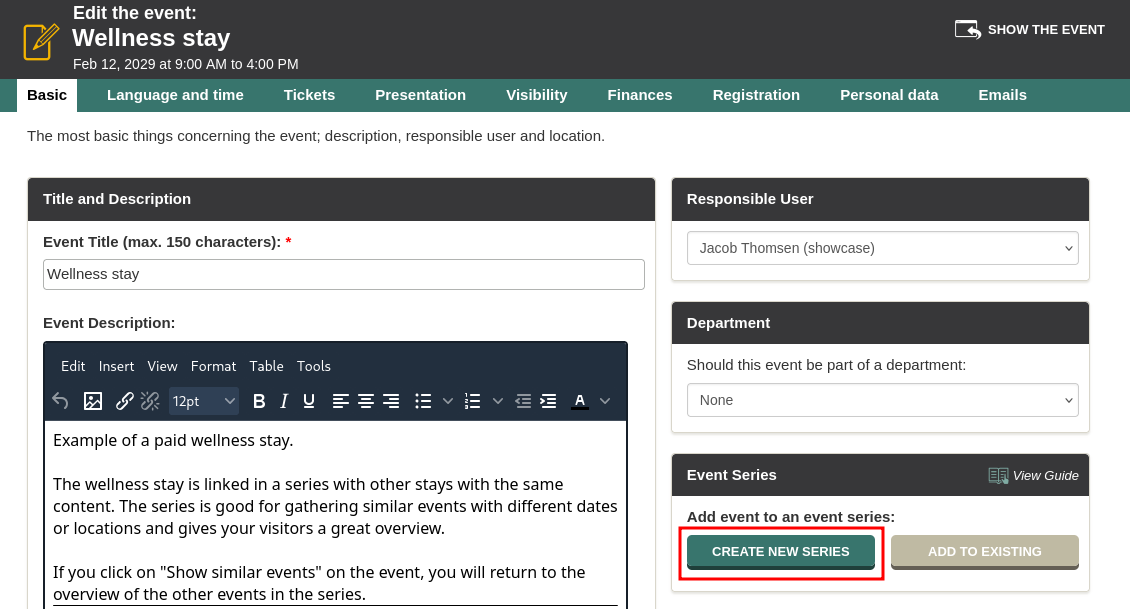
Find the section "Event series" under "Basic" and click "Create new series", name the series and click "Approve". Click “Save and Stay on Page” at the bottom of the page.
For the event to appear in the series you'll have to publish it. To publish the event simply check the box "Publish the event and approve Terms og Registration" at the bottom of the page before saving your changes.
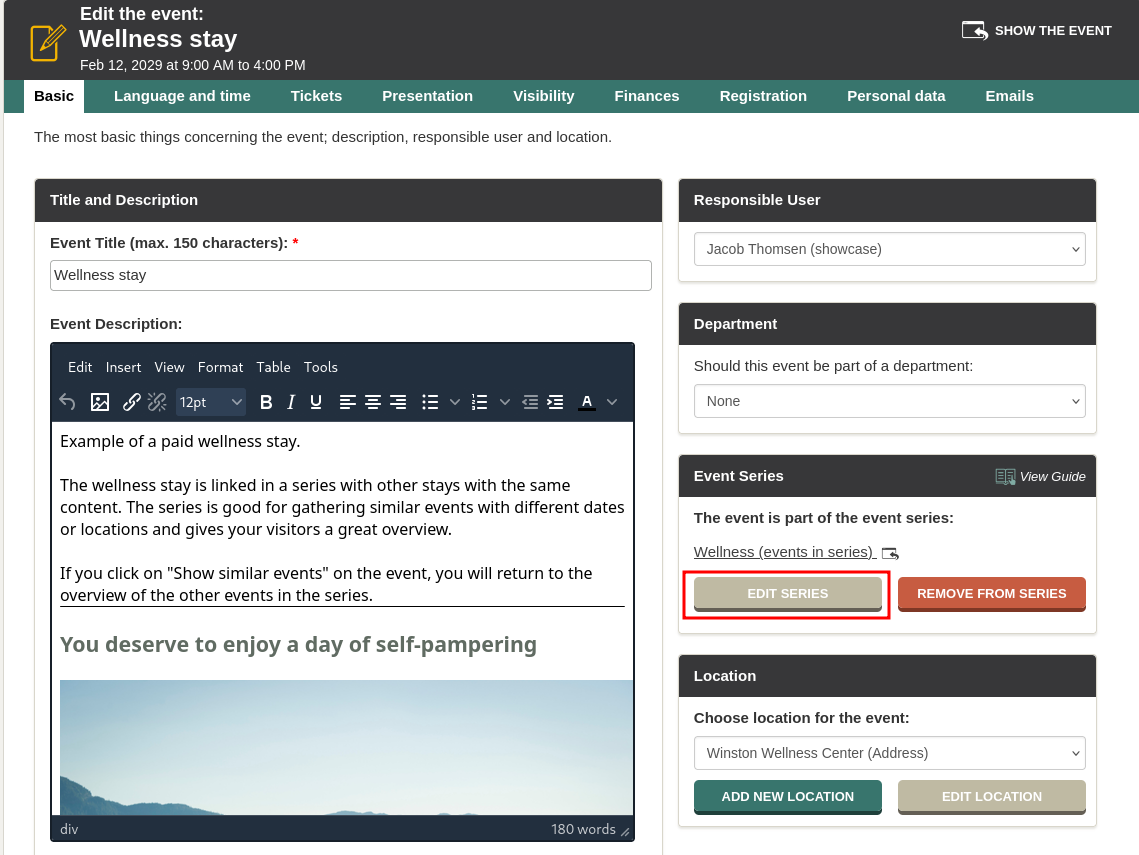
The event is now a part of a series. Now you can click "Edit the series" to set different things about the landing page of the series:
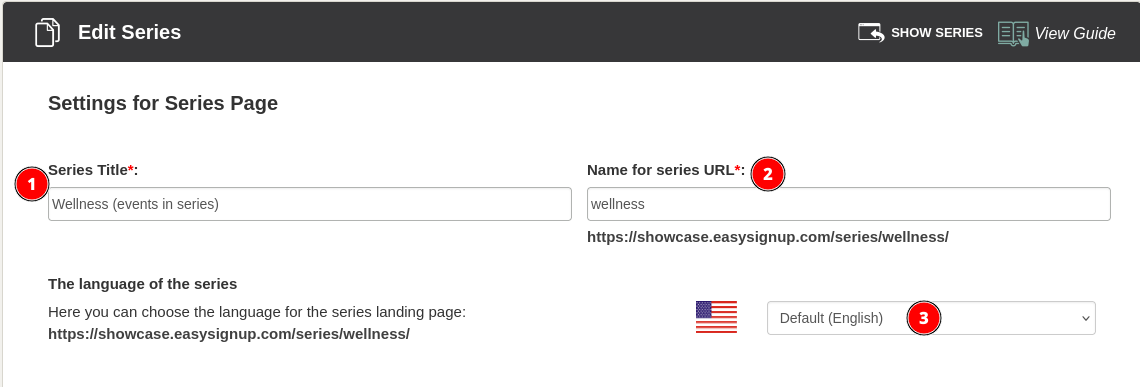
You will now be directed to a page, where you can edit and add information about the series. In "Series title" you can edit the name of the series (1). Visitors to your page will see the name, when they visit your page at EasySignup.
You can also edit the link that refers to the series (2). You can use this link, if you want to link to the series from your own website, social media or newsletters.
You can also choose which language the series landing page should be in (3). If you do not select anything, the language for the series landing page will be the same as the default language of the account.
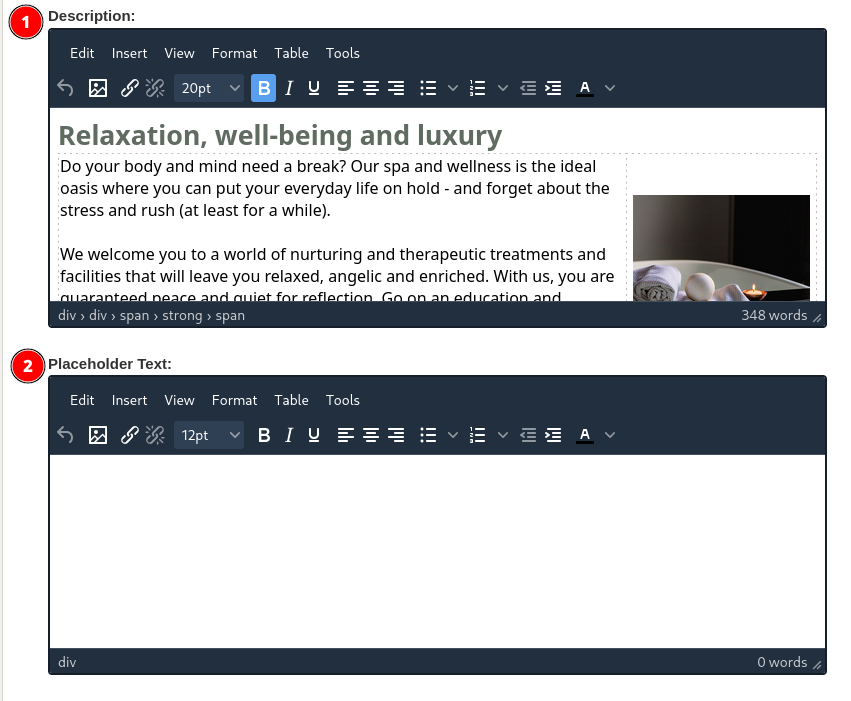
You can add text and images under "Description" to give your visitors an overall description of all of the events in the series (1).
If there are no upcoming events in the series, you can insert a "Placeholder Text", which will be shown instead (2). If you do not write anything, it will say "Currently there are no available events."
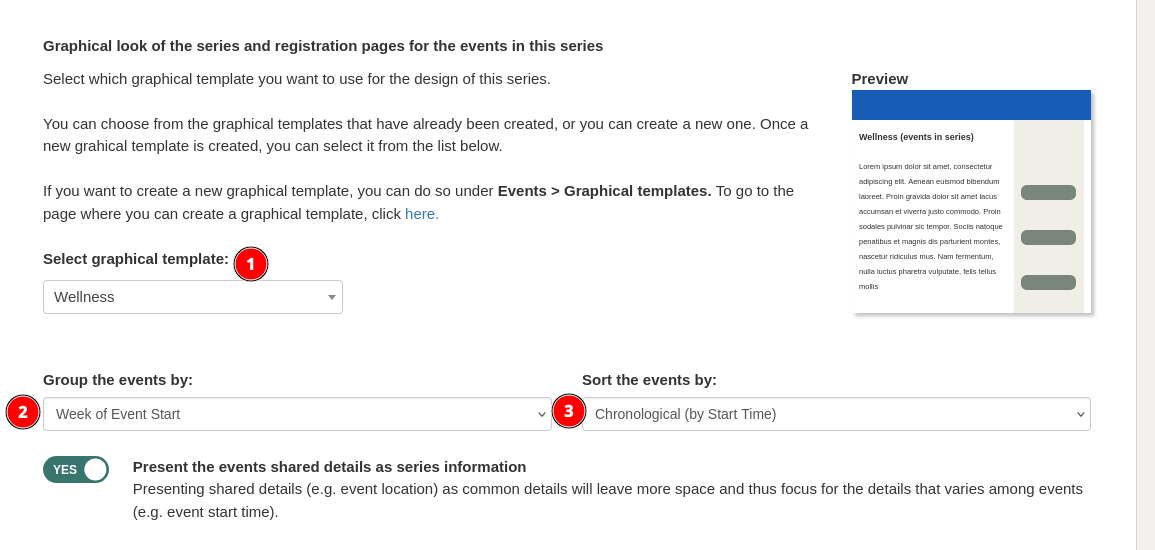
You can select a graphical template for all of the events in the series (1).
You can also choose to gather the events in groups, e.g. by title or location (2). And you can choose, how to sort the events (3).
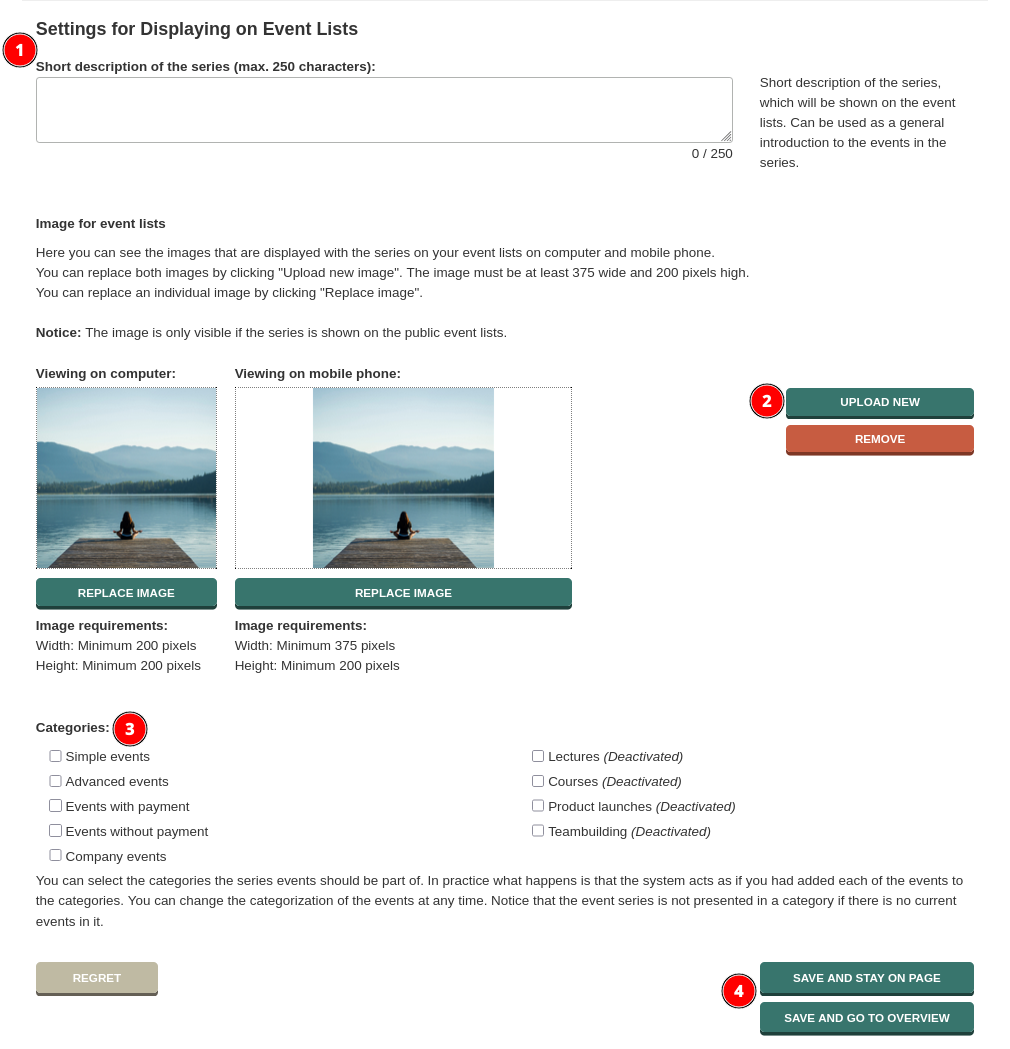
Under "Settings for Displaying on Event Lists" you can add a short description of the series (1) and a picture (2), which will be visible for visitors on your public event lists, for example the front page and category pages.
If you are using categories on your event lists, you can mark which categories the series should appear in (3).
When you are done filling in information about the series, click "Save and go to the overview" at the bottom right (4).
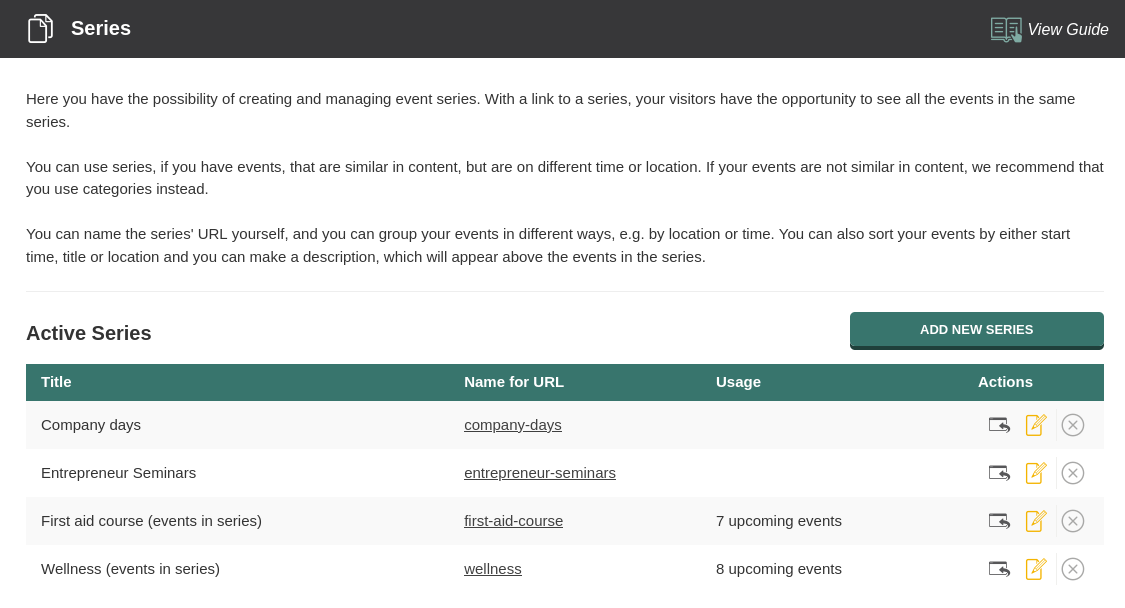
You will now return to the list of series. Here you can see names, links and other information about the active series. Under "Actions" you can view the series, edit it or deactivate it, if you no longer need it.
Now your are ready to add more events to the series. You can do that by copying the original event you started with. See how to copy an event in this guide.
Or you can add an existing event to the series. See how in this guide.
We've made a series of videos showing you how to use EasySignup.
Watch introductory videosWhether you are a participant or an organizer, some of the questions you might have about the IT-system are answered here.
Read the answers
Mette Jellesen and Jacob Thomsen
Support and Communication